If you are a meat lover who consumes meat regularly, you would probably want to have a meat grinder in your acquisition if you don’t already have. Moving forward, let us assume you bought a meat grinder, but you don’t know how to assemble all the parts if you want to use it.
We know there are two types of meat grinders, electrical and manual. The electrical meat grinders do not take as long as manual meat grinders take to assemble. The electrical meat grinder is run by electricity, and the manual one has to be done by your hands, so there are many parts to assemble.
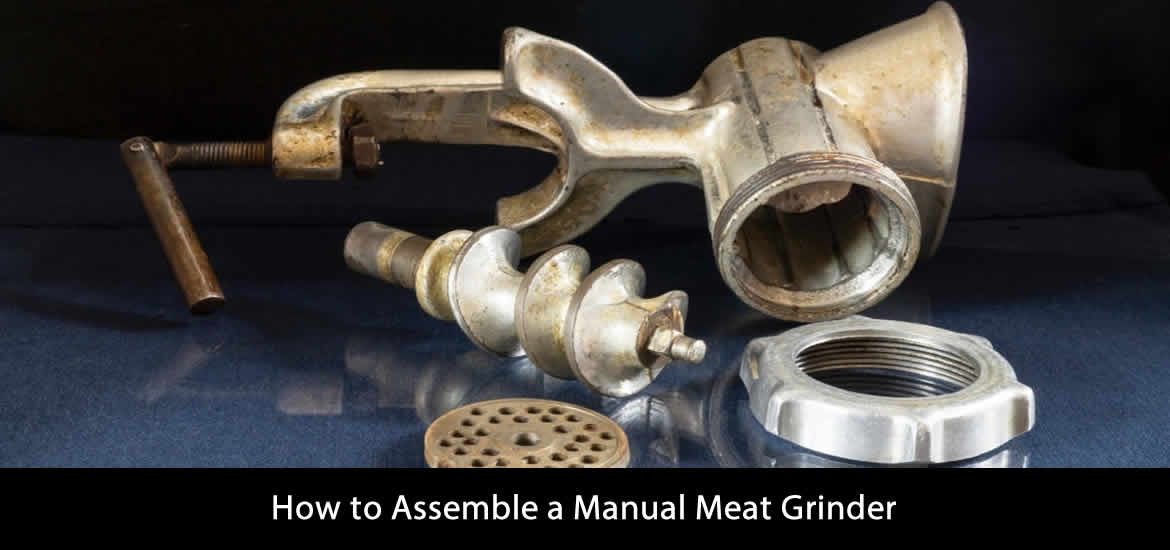
How to Assemble a Manual Meat Grinder
First, let us focus on how to assemble a Manual Meat Grinder.
Step 1: Recognizing the parts
The grinder has a main body and comes with all other parts which you will need to attach. Different brands may have parts that vary, but in general, they include- the main body, hand screw, handle, grinding plate, locking ring, cutting blade, and inlet.
You should have these parts assembled before attaching them. Make sure you have these parts clean, dry and free of rust before use.
Step 2: Placing the handle
Attach the handle screw first, then insert the handle. After placing the handle, you should be able to move it freely. Make sure it does not slip or rubs too much after attaching. If it does, then you have to fix it appropriately.
If you do not insert it properly can damage the working surface while you are grinding. Also, properly attaching the handle will keep you injury-free.
Step 3: Attaching the blade
You will need to insert the auger into the main body before attaching the blade. It keeps the blade and the extrusion plate in place. Make sure you have the right extrusion plate for your grinder.
The size of the holes will determine what shape the meat will be after grinding. The meat that comes out of the plate has to pass through the auger and blade.
The plate can vary in form, fine, medium, or coarse. You pick one and fix the blade into the auger. Grinders nowadays have a smaller auger, which holds the cutting blade and the extrusion plate.
Step 4: Mounting the grinder
Now that you are done with fixing the blade, you have to mount the grinder onto the table. Find a strong and stable surface to place the grinder. Secure the position by using wedges on the counter or table.
The wedges must keep it strong and stable. It will otherwise move while grinding. Without setting it properly, grinding will be difficult and uncomfortable.
Tips and warnings
Disassemble the grinder after using it, and prepare it for storage. Reverse the assembling process and make sure you don’t lose them. Be careful with the blade while removing it.
Always clean the meat grinder after you remove the parts. Keeping it clean, rust-free and dry before storing is important.
Do not forget to clamp your meat grinder to the table or counter before you start grinding. Also, be careful when you put meat into the grinder. You might set your finger into the grinder accidentally.
Check this review: The 5 Best Meat Grinder for Bones – 2026 Reviews – Good in Quality
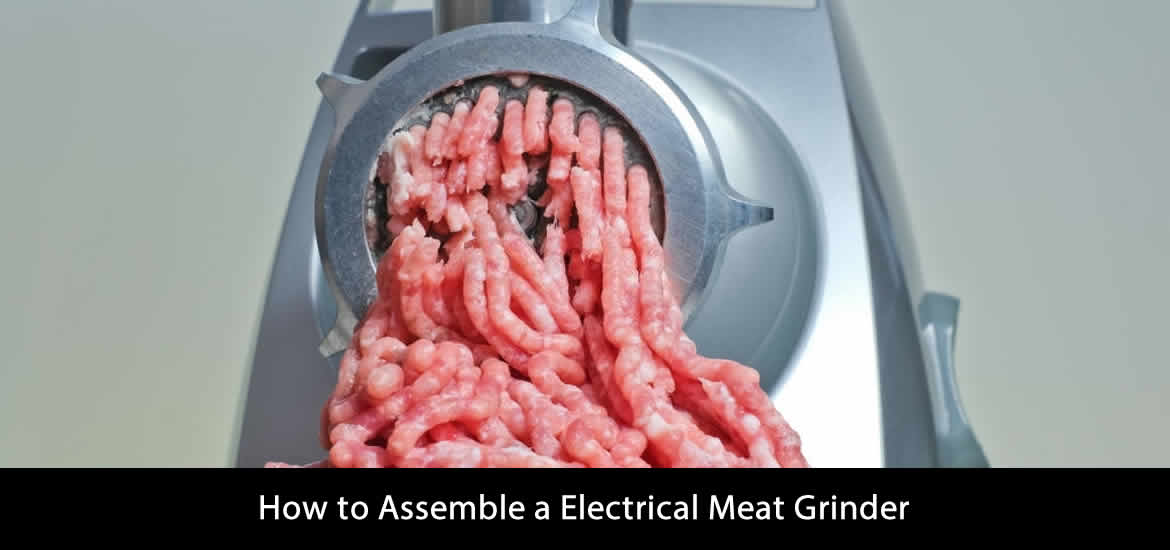
How to Assemble a Electrical Meat Grinder
Now, let us show you How to assemble Electrical Meat Grinder
Step 1: Assemble the parts
It is imperative that you recognize these parts before assembling. They include- hopper, feed screw, cutting blade, cutting plate, screw ring, motor housing, and power cord.
Step 2: Placing the head
First, put the feed screw; then place the cutter blade into the other side of that feed screw. Make sure it is placed on the flat side facing outwards.
There should be a nut with the grinder head assembly to tighten it. If not, then the grinder head should be fixed with the main body. Attach the head and turn it clockwise to seal it.
Step 3: Placing the blade and hopper
Different brands may have slightly different design methods, which can make it contrasting when assembling the parts. Most electrical grinders have their assembled head and blade fixed with the body as it comes. If that is not the case, then use the given screw to insert the blade and plate.
A meat tray container will be given, which you will use to put the meat and push it for grinding. That meat tray is the hopper. Attach it over the head.
Step 4: Connecting to power
If you are done with assembling all the parts, check if your model needs to attach the motor to the grinder assembly. If not, then make sure you attach them with appropriate slots.
Tips and warnings
Make sure that the meat grinder is unplugged before you start assembling it or disassemble it. For maintaining hygiene, always clean the meat grinder before and after you use it.
Read the instructions by the manufacturers, which will be provided on the label or inside.
Related Kitchen Gadget Reviews:
- Best Vacuum Sealer Under 100 Dollars
- Top 10 Best Soy Milk Maker – 2026 Reviews – Best in Quality
- Top 14 Best Kitchen Utensil Sets 2026 – Cheap But Best in Quality
- 3 Best Sous Vide Rack – 2026 Reviews – Best in The Market
- Best Electric Griddle – 2026 Reviews – Best On The Market
- Top 12 Best Soda Makers For Home – 2026 Reviews – Best on The Market
- Top 10 Best Cooking Torch Reviews of 2026
- The Top 12 Best Sous Vide Machines For Home Kitchens 2026