The Most Effective Ways to Overcome Vacuum Sealer Problems
A vacuum sealer is one of the most useful kitchen tools for food storage, sous vide cooking, meal prep, and reducing food waste. It helps remove air from storage bags and creates a tight seal that keeps food fresher for longer. However, like any appliance, vacuum sealers can sometimes create frustrating problems.
You may notice that the machine is not removing air properly, the bag is not sealing, liquid is getting sucked into the machine, or the seal breaks after a few hours. These problems are common, especially for beginners, but most of them are easy to fix once you understand the cause.
This guide explains the most effective ways to overcome vacuum sealer problems so you can get stronger seals, better food storage, and more consistent results.

Why Vacuum Sealer Problems Happen
Vacuum sealer issues usually happen because of one of these reasons:
- The bag is not positioned correctly.
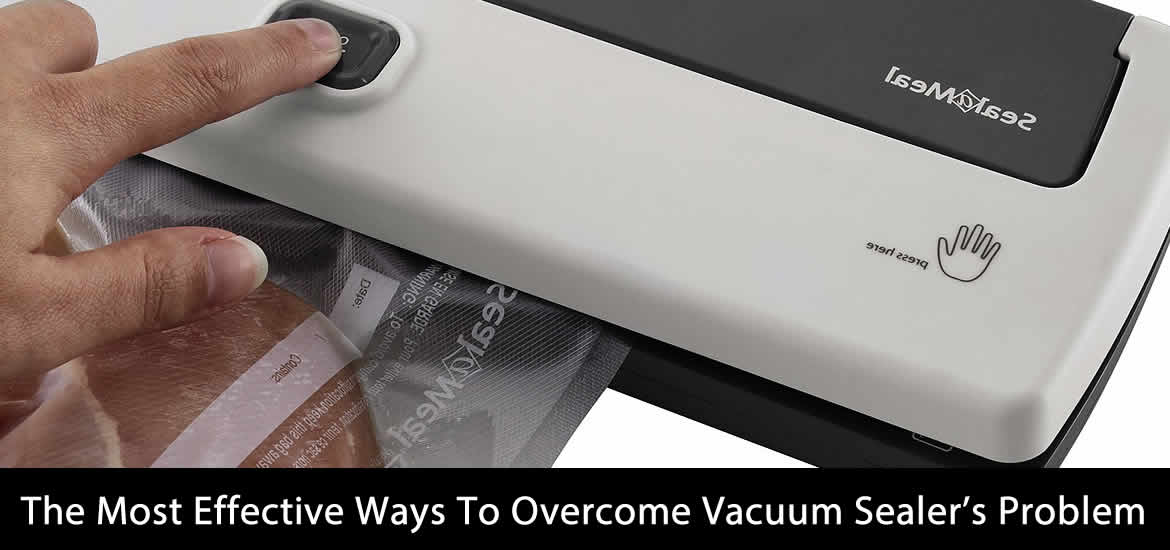
- The bag opening is wet, oily, wrinkled, or dirty.
- The sealing strip is damaged or overheated.
- The food contains too much moisture.
- The vacuum channel is blocked.
- The bag is low quality or not compatible with the machine.
- The machine needs cleaning, cooling, or maintenance.
The good news is that most vacuum sealer problems do not mean the machine is broken. In many cases, a small adjustment can solve the issue.
Problem: Vacuum Sealer Is Not Removing Air Properly
One of the most common problems is when the vacuum sealer runs, but air stays inside the bag. This can happen with meat, vegetables, cooked food, dry goods, and sous vide bags.
Possible Causes
The bag may not be inserted far enough into the vacuum channel. If the open end of the bag is not placed correctly, the machine cannot pull air out properly.
Another reason could be a wrinkle or fold near the bag opening. Even a small crease can stop the machine from creating a proper vacuum.
The bag may also have a tiny hole, especially if you are sealing food with bones, sharp edges, pasta, shells, or hard frozen items.
Best Solutions
Place the open end of the bag flat inside the vacuum channel. Make sure it is centered and not curled.
Smooth the bag opening with your fingers before closing the lid.
Leave enough space at the top of the bag. A good rule is to keep at least 3 inches of empty space between the food and the bag opening.
Check the bag for punctures. If the food has sharp edges, wrap it with parchment paper or a small food-safe barrier before sealing.
Use proper vacuum sealer bags instead of ordinary plastic storage bags.
Problem: Vacuum Sealer Is Not Sealing the Bag
Sometimes the machine removes air, but the bag does not seal properly. You may see the bag open again, or the seal may look weak, incomplete, or melted unevenly.
Possible Causes
- The sealing area may be wet, oily, or dirty. Moisture is one of the biggest reasons vacuum bags fail to seal.
- The heating strip may not be hot enough, or the machine may be overheated from repeated use.
- The bag may be too thin, too thick, or not compatible with your vacuum sealer.
- The lid may not be fully locked during the sealing process.
Best Solutions
Before sealing, wipe the inside and outside of the bag opening with a dry paper towel.
- Keep food away from the sealing area. Do not overfill the bag.
- Use the “moist” setting if your vacuum sealer has one.
- Let the machine rest for 20–30 seconds between seals, especially when sealing many bags.
- Check whether the lid is fully locked before starting.
- Use high-quality textured vacuum sealer bags that are compatible with your machine.
For extra protection, create a double seal by sealing the bag twice. This is especially useful for sous vide cooking, liquids, meat, fish, and long-term freezer storage.
Problem: Liquid Is Being Sucked Into the Vacuum Sealer
This is a very common problem when sealing fish, meat, marinated food, soups, sauces, cooked meals, or juicy vegetables. When the vacuum pulls air out, it can also pull liquid toward the machine.
Why This Is a Problem
Liquid can prevent the bag from sealing properly. It can also enter the vacuum channel and make the machine dirty. If too much liquid reaches the internal parts, it may damage the sealer.
Best Solutions
Use the pulse vacuum function if your machine has one. This lets you control the vacuum manually and stop before liquid reaches the seal area.
Freeze wet foods for 30–60 minutes before sealing. The food does not need to be fully frozen. It only needs to be firm enough to stop liquid from moving too quickly.
For soups, sauces, and stews, freeze the food in a container first, then vacuum seal the frozen block.
Place a folded paper towel near the top of the bag, between the food and the sealing area. This can help absorb extra moisture. Make sure the paper towel does not touch the seal line.
Use a larger bag to create more distance between the food and the machine.
Select the “moist food” setting if available.
Problem: Vacuum-Sealed Bag Loses Air After Sealing
A bag may look perfectly sealed at first, but later it becomes loose or puffy. This usually means air has entered the bag after sealing.
Possible Causes
- There may be a tiny hole in the bag.
- The seal may be weak or incomplete.
- The food may be releasing gas, especially fresh vegetables, soft fruits, or fermenting foods.
- The bag may have been damaged in the freezer.
- Sharp food edges may have punctured the plastic.
Best Solutions.
- Inspect the seal line carefully. A good seal should look smooth, complete, and even.
- Double seal the bag for extra protection.
- Avoid sealing very sharp foods directly against the plastic.
- Blanch vegetables before vacuum sealing and freezing. Some vegetables release gases if sealed raw.
- Do not overfill the bag.
- Use thicker vacuum sealer rolls or bags for freezer storage.
- When storing food in the freezer, place vacuum-sealed bags carefully so they do not rub against sharp frozen items.
Problem: Vacuum Sealer Overheats or Stops Working
If you seal many bags one after another, your machine may stop working temporarily or fail to seal properly. This often happens with compact home vacuum sealers.
Possible Causes
- The heating strip may be too hot.
- The machine may have an automatic safety shut-off.
- The motor may need time to cool down.
- The sealing strip may be worn out from heavy use.
Best Solutions
- Give the machine a short break between sealing cycles.
- Do not run too many seals continuously without rest.
- Use pre-cut bags if you are sealing a large batch of food. This reduces the number of extra seals needed.
- Check your user manual for the recommended cooling time.
- If the machine regularly overheats after only one or two seals, inspect the sealing strip and gasket.
Problem: Bag Melts or Burns During Sealing
A melted or burned bag usually means the heat setting is too strong for the bag material, or the sealing area stayed on the heat strip too long.
Possible Causes
- The bag may be too thin.
- The heat setting may be too high.
- The sealer may be malfunctioning.
- You may be using non-compatible bags.
Best Solutions
- Use bags designed for vacuum sealers.
- Avoid ordinary plastic bags, sandwich bags, or thin storage bags.
- If your machine has adjustable sealing time, reduce it slightly.
- Allow the machine to cool between uses.
- Check if the heating strip is clean and free from melted plastic residue.
Problem: Vacuum Sealer Does Not Turn On
If the machine does not power on, the problem may be electrical or mechanical.
Possible Causes
- The power cord may not be connected properly.
- The outlet may not be working.
- The lid may not be locked.
- The machine may have overheated.
- There may be an internal fault.
Best Solutions
- Check the plug and power outlet.
- Try another outlet.
- Make sure the lid is fully closed and locked.
- Let the machine cool for several minutes.
- Check whether the power button, latch, or safety lock is stuck.
If the machine still does not turn on, contact the manufacturer or consider professional repair.
Problem: Weak Seal on Moist or Oily Foods
Moist and oily foods are harder to seal than dry foods. Meat, fish, cheese, marinated chicken, and cooked meals can leave moisture or grease near the bag opening.
Best Solutions
- Pat food dry before placing it in the bag.
- Fold the top of the bag outward before adding food. This keeps the sealing area clean.
- After filling the bag, unfold the top and wipe the opening.
- Use a larger bag to keep moisture away from the seal line.
- Double seal the bag.
- Use the moist setting if available.
- For oily foods, make sure no oil touches the sealing strip area.
Problem: Food Gets Crushed During Vacuum Sealing
Soft foods like bread, berries, cakes, chips, cookies, and delicate vegetables can be crushed under strong vacuum pressure.
Best Solutions
- Use the pulse vacuum mode.
- Stop the vacuum early and seal manually.
- Freeze delicate foods before vacuum sealing.
- Use vacuum containers instead of bags.
- For bread or baked goods, freeze first, then vacuum seal.
- For chips or snacks, use the seal-only function instead of full vacuum.
Problem: Vacuum Bag Floats During Sous Vide Cooking
If you use vacuum-sealed bags for sous vide, the bag may float in the water bath. Floating bags can lead to uneven cooking because part of the food may not stay fully submerged.
Possible Causes
- Too much air remains inside the bag.
- The food naturally releases gas during cooking.
- The bag is not sealed tightly.
- Lightweight food floats easily.
Best Solutions
- Make sure the bag is fully vacuumed before cooking.
- Use a vacuum sealer bag rather than a regular zip bag.
- Clip the bag to the side of the container.
- Use sous vide weights or a rack.
- Place a spoon or butter knife inside the bag only if it is clean, food-safe, and suitable for cooking.
- Double check the seal before placing the bag in the water bath.
Problem: Vacuum Sealer Gasket Is Not Working Properly
The gasket is the soft rubber or foam ring that helps create suction. If it becomes dirty, loose, cracked, or compressed, the machine may not vacuum properly.
Best Solutions
- Clean the gasket gently with a damp cloth.
- Remove food particles from the vacuum channel.
- Let the gasket dry completely before using the machine.
- Check for cracks, flattening, or damage.
- If the gasket is worn out, replace it according to the manufacturer’s instructions.
- A damaged gasket is one of the most common reasons an older vacuum sealer loses suction.
Problem: Vacuum Channel Is Dirty or Blocked
The vacuum channel collects moisture, crumbs, food particles, and small debris. If it becomes blocked, the sealer may struggle to remove air.
Best Solutions
- Unplug the machine before cleaning.
- Wipe the vacuum channel after each use.
- Remove liquid from the drip tray if your machine has one.
- Use a cotton swab or soft cloth for small areas.
- Do not pour water directly into the machine.
- Keep the sealing strip dry and clean.
- Regular cleaning improves suction, sealing quality, and machine life.
How to Prevent Vacuum Sealer Problems
The best way to overcome vacuum sealer problems is to prevent them before they happen. Follow these simple habits:
- Use the correct bags.
- Do not overfill bags.
- Keep the seal area clean and dry.
- Leave enough space at the top of the bag.
- Use dry, firm, or partially frozen food when sealing wet items.
- Let the machine rest between sealing cycles.
- Clean the vacuum channel and drip tray regularly.
- Double seal bags for freezer storage or sous vide cooking.
- Store bags flat in the freezer to prevent punctures.
- Check the gasket and sealing strip often.
Best Bags to Use for Fewer Problems
Bag quality has a major effect on vacuum sealing performance. Low-quality bags often cause weak seals, leaks, and air loss.
- The best bags are usually:
- Food-grade
- BPA-free
- Thick and durable
- Textured on one side
- Compatible with your vacuum sealer
- Suitable for freezer storage
- Safe for sous vide if you plan to cook with them
- Avoid thin plastic bags, grocery bags, unknown plastic, and bags that are not made for vacuum sealing.
Final Recommendation
Vacuum sealer problems are common, but most are easy to solve. If your vacuum sealer is not working properly, start with the basics: check the bag placement, clean the sealing area, wipe away moisture, inspect the gasket, and use the correct bags.
For wet foods, use the moist setting, pulse mode, or freeze the food slightly before sealing. For long-term storage and sous vide cooking, double seal the bag for extra protection.
A vacuum sealer works best when the machine is clean, the bag is high quality, and the food is prepared correctly before sealing. With the right method, you can avoid weak seals, air leaks, liquid problems, and wasted food.
FAQs about Overcome Vacuum Sealer’s Problem

Why is my vacuum sealer not sealing properly?
Your vacuum sealer may not seal properly because the bag opening is wet, oily, wrinkled, dirty, or incorrectly placed. Wipe the bag opening, smooth it flat, and try sealing again.
Why is my vacuum sealer not removing air?
This can happen if the bag is not inserted into the vacuum channel correctly, the gasket is damaged, the bag has a hole, or the vacuum channel is dirty.
Can I vacuum seal wet food?
Yes, but wet food needs extra care. Use the moist setting, pulse mode, or partially freeze the food before sealing. You can also place a folded paper towel near the top of the bag to catch liquid.
Why does my vacuum-sealed bag lose air later?
The bag may have a small puncture, the seal may be weak, or the food may be releasing gas. Use thicker bags, double seal, and avoid sharp food edges.
Should I double seal vacuum bags?
Yes, double sealing is recommended for sous vide cooking, freezer storage, meat, fish, and wet foods. It gives extra protection against leaks.
Can I use regular plastic bags in a vacuum sealer?
No. Regular plastic bags are usually not designed for vacuum sealing. Use proper vacuum sealer bags or rolls that are compatible with your machine.
How do I stop liquid from entering my vacuum sealer?
Partially freeze wet food before sealing, use a larger bag, activate pulse mode, and keep the food away from the seal line.
Why is my vacuum sealer crushing food?
The vacuum pressure may be too strong for soft food. Use pulse mode, stop the vacuum early, or freeze delicate foods before sealing.
Related posts: